A hammock stand offers a resting spot without needing trees or wall mounts. If your space lacks those, building one yourself is a smart, budget-friendly solution. This guide walks through the process with clear steps, a basic material list, and tips that focus on structure, safety, and aesthetics.
Tools and Materials Needed
Tools:
- Power drill
- Saw (circular or hand)
- Measuring tape
- Wrench set
- Sandpaper or sander
- Pencil or chalk for marking
Materials:
- (6) Pressure-treated 2×4 or 2×6 boards (8 feet each)
- (2) Eye bolts with nuts and washers
- (4) Carriage bolts with nuts and washers
- Wood screws
- Outdoor wood stain or sealant
Step-by-Step: Build a Wooden A-Frame Hammock Stand
1. Measure and Cut the Frame Pieces
- Cut four 2x4s at a 45-degree angle on one end. These form the legs.
- Cut two horizontal base beams to 6 feet each.
- Cut a stretcher beam for the top crossbar (7-8 feet based on your hammock size).
2. Assemble the Base
- Attach the two 6-foot beams parallel to each other.
- Position each pair of angled leg pieces to form an “A” on both sides of the base.
- Drill pilot holes to avoid splitting the wood.
- Secure legs to the base using carriage bolts.
3. Install the Crossbar
- Position the crossbar across the tops of the A-frames.
- Drill holes through both the crossbar and leg tops.
- Insert carriage bolts and tighten them.
4. Add the Eye Bolts
- Drill holes near each end of the crossbar (about 6 inches from the ends).
- Install eye bolts through the wood with washers and nuts for security.
- These serve as anchor points for your hammock.
5. Sand and Finish
- Smooth all edges and corners with sandpaper.
- Apply wood stain or sealant to protect against moisture and sun exposure.
Design Tips
- For Portability: Add caster wheels to the base if you plan to move it often.
- For Backyard Aesthetics: Match the stain to other outdoor furniture.
- For Extra Stability: Add diagonal braces between the legs and base.
Hammock Stand Variations
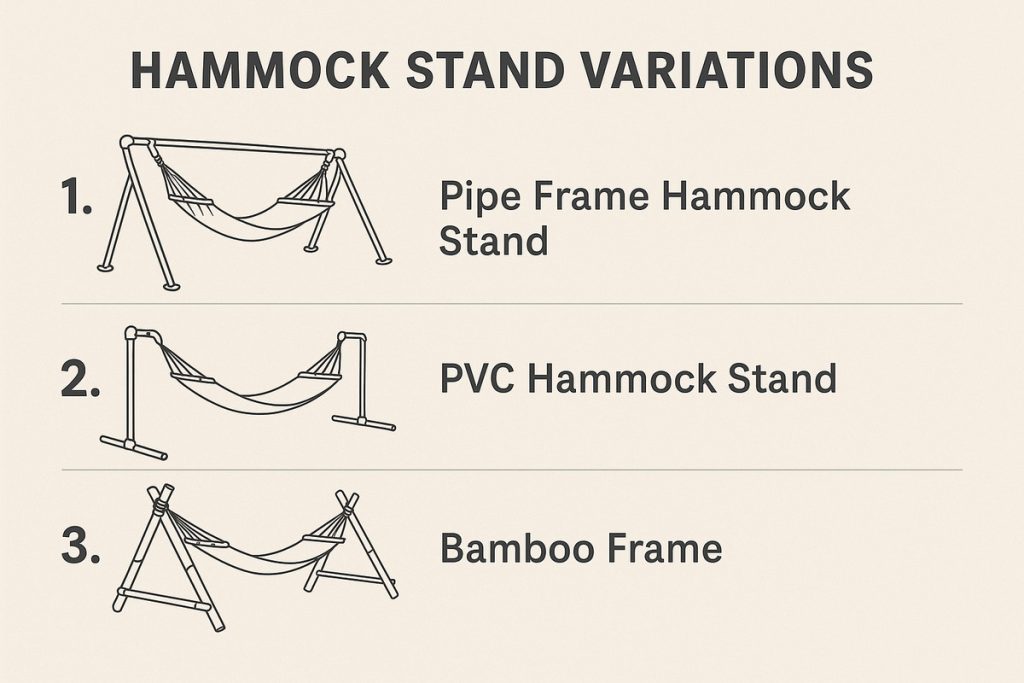
1. Pipe Frame Hammock Stand
- Use galvanized steel pipes and fittings.
- Great for industrial or modern aesthetics.
- Requires pipe wrench and threading know-how.
2. PVC Hammock Stand
- Lightweight and quick to assemble.
- Ideal for temporary indoor use.
- Not suitable for heavy weights or long-term use outdoors.
3. Bamboo Frame
- Adds a rustic look.
- Use rope lashings for joints.
- Best for lighter hammocks.
Weight Capacity & Safety Tips
- Always match wood size to expected load. For adult use, stick to 2×6 lumber.
- Use treated wood to resist rot and insects.
- Test with light weight first before full use.
- Check all bolts and screws regularly if used outdoors.
Why Build Instead of Buy?
- Tailor to your exact space.
- Control over strength and height.
- Cost-effective using locally available materials.
- Personal satisfaction from crafting it by hand.
Final Check
- Secure hardware
- Level structure
- Tension-tested eye bolts
Once built, your hammock stand becomes more than support—it becomes part of the landscape. Whether on a patio, balcony, or under open sky, it’s your design holding up your relaxation.