Binding a book by hand gives you control over every detail—from cover design to stitch type. Whether you’re making a journal, zine, artbook, or family keepsake, the process is surprisingly accessible. You don’t need heavy machinery or specialized training. Just some basic tools, patience, and a clear set of steps.
Materials You’ll Need
- Paper (for the inner pages)
- Cardstock or cardboard (for the covers)
- Bone folder (optional but helpful)
- Ruler
- Pencil
- Awl or push pin
- Waxed thread or strong embroidery floss
- Bookbinding needle (or any sharp, large-eyed needle)
- Glue (PVA or strong craft glue)
- Cloth or decorative paper (for the outer cover)
- Binder clips or clothespins
Step 1: Prepare Your Signatures
Fold your paper sheets in half. Stack 4–6 sheets together to form a signature. Each signature will be one “section” of your book. Repeat until you reach the desired number of pages.
Pro tip: Using a bone folder creates crisp, clean folds.
Step 2: Measure and Mark Your Holes
Take one signature. Open it flat. Use a ruler and pencil to mark 4–6 evenly spaced dots along the crease. These will be your sewing holes. Transfer the same marks to the other signatures using the first as a template.
Step 3: Punch the Holes
Use an awl or a sharp push pin to pierce each mark. Do this carefully to keep holes straight and aligned across all signatures. This ensures a neat binding later.
Step 4: Prepare the Covers
Cut two pieces of cardboard slightly larger than your paper—about ⅛ inch extra on each edge. Wrap these in decorative paper or cloth. Glue the material neatly around the edges and fold it over to the inside. Let dry under a heavy book.
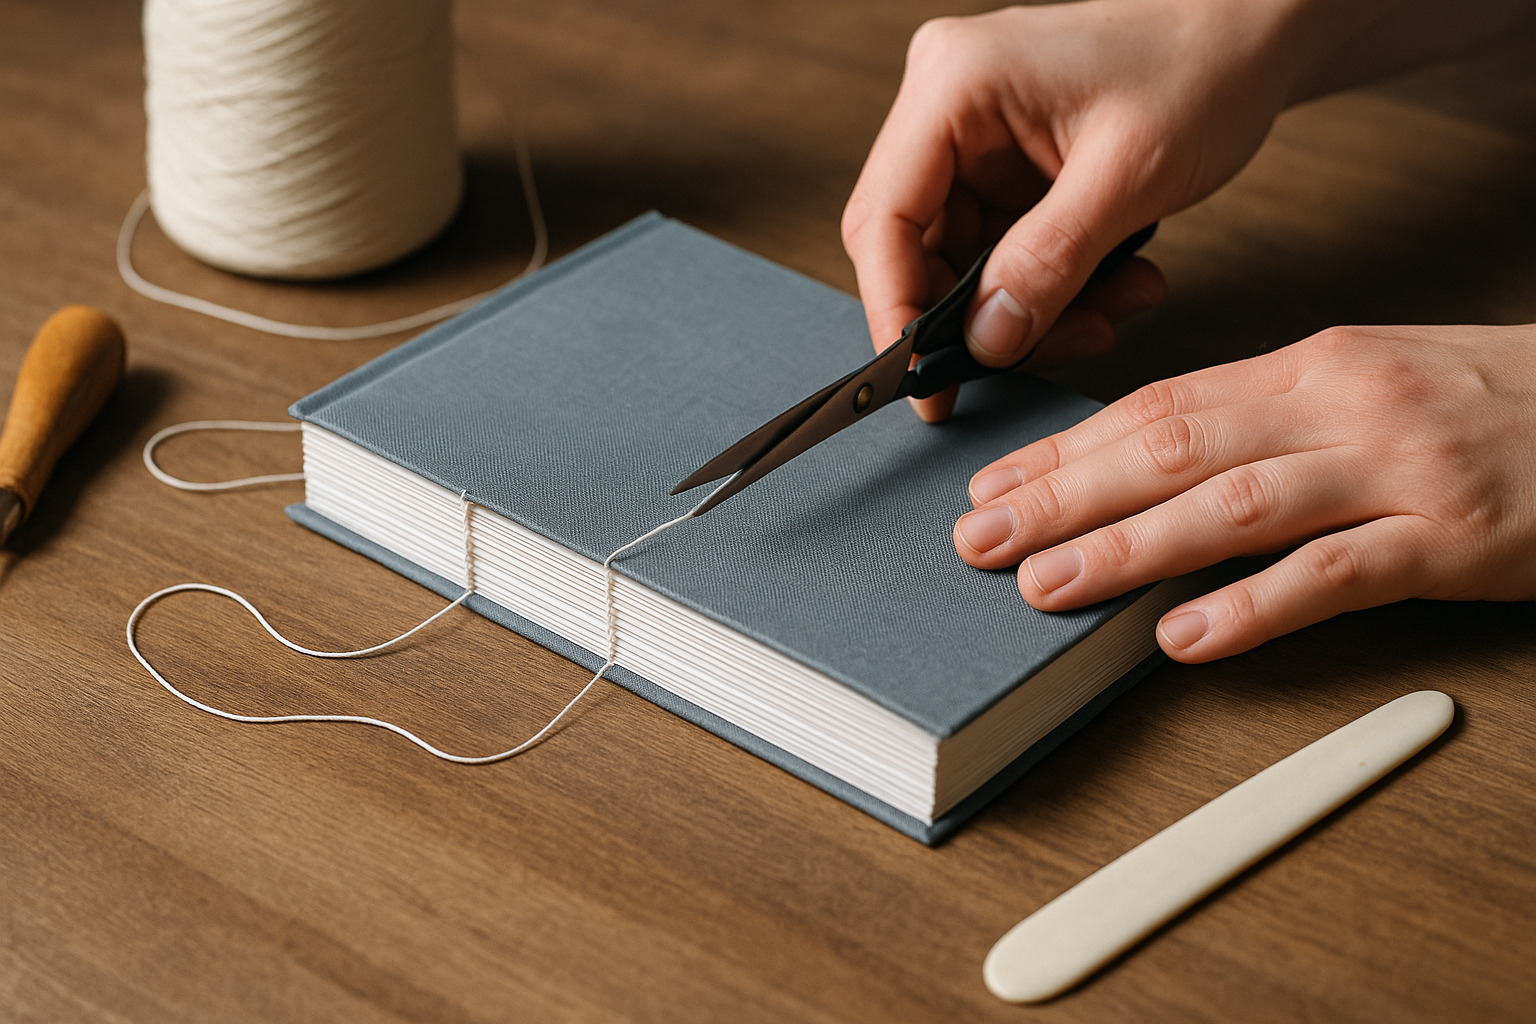
Step 5: Stitch the Book Together (Pamphlet or Coptic Stitch)
There are different methods for hand-binding. The pamphlet stitch is simple and quick for thin books. The Coptic stitch works better for thicker ones and allows the book to lie flat.
For a basic pamphlet stitch:
- Thread your needle with waxed thread (about 3–4 times the book height).
- Start in the center hole from the inside of the signature.
- Go out, in through the bottom hole, back up to the top, then back into the center.
- Tie off securely in the center and trim excess thread.
For Coptic binding (for multiple signatures):
- Sew each signature to the next by looping thread through the previous stitch.
- Attach the covers during the first and final stitches.
This method requires more care but gives a flexible spine and a nice exposed stitch look.
Step 6: Attach the Cover (If Not Already Stitched)
If your stitch style didn’t include the cover (like in pamphlet binding), glue the first and last page to the inside of each cover. Use a thin layer of glue, press flat, and let it dry under weight to avoid wrinkling.
Step 7: Press and Finish
Once stitched and glued, use binder clips to hold the book tight. Press it under a heavy stack of books for several hours or overnight. This sets the binding and flattens the shape.
You can add extras like endpapers, bookmarks, or a title label once it’s dry.
Why Hand-Binding Matters
Hand-bound books carry character. No two are identical. The stitching, the slight imperfections, the tactile quality—these turn an everyday object into something meaningful. Whether you keep it, gift it, or sell it, the result speaks of time, thought, and care.
Bookbinding Variations to Try Later
- Japanese stab binding for decorative edge stitching.
- Hardcover case binding for a traditional look.
- Accordion books for a sculptural feel.
Each technique brings new possibilities. Once you’ve tried one, the others build on the same foundation: precision, patience, and creativity.