Creating paper roses is a satisfying project that adds charm to any space. Whether you’re decorating for an event, designing a handmade gift, or building a bouquet that lasts, paper roses bring life to your creations without the need for fresh blooms. This guide shows how to make them from scratch—no templates or machines required.
Materials You’ll Need
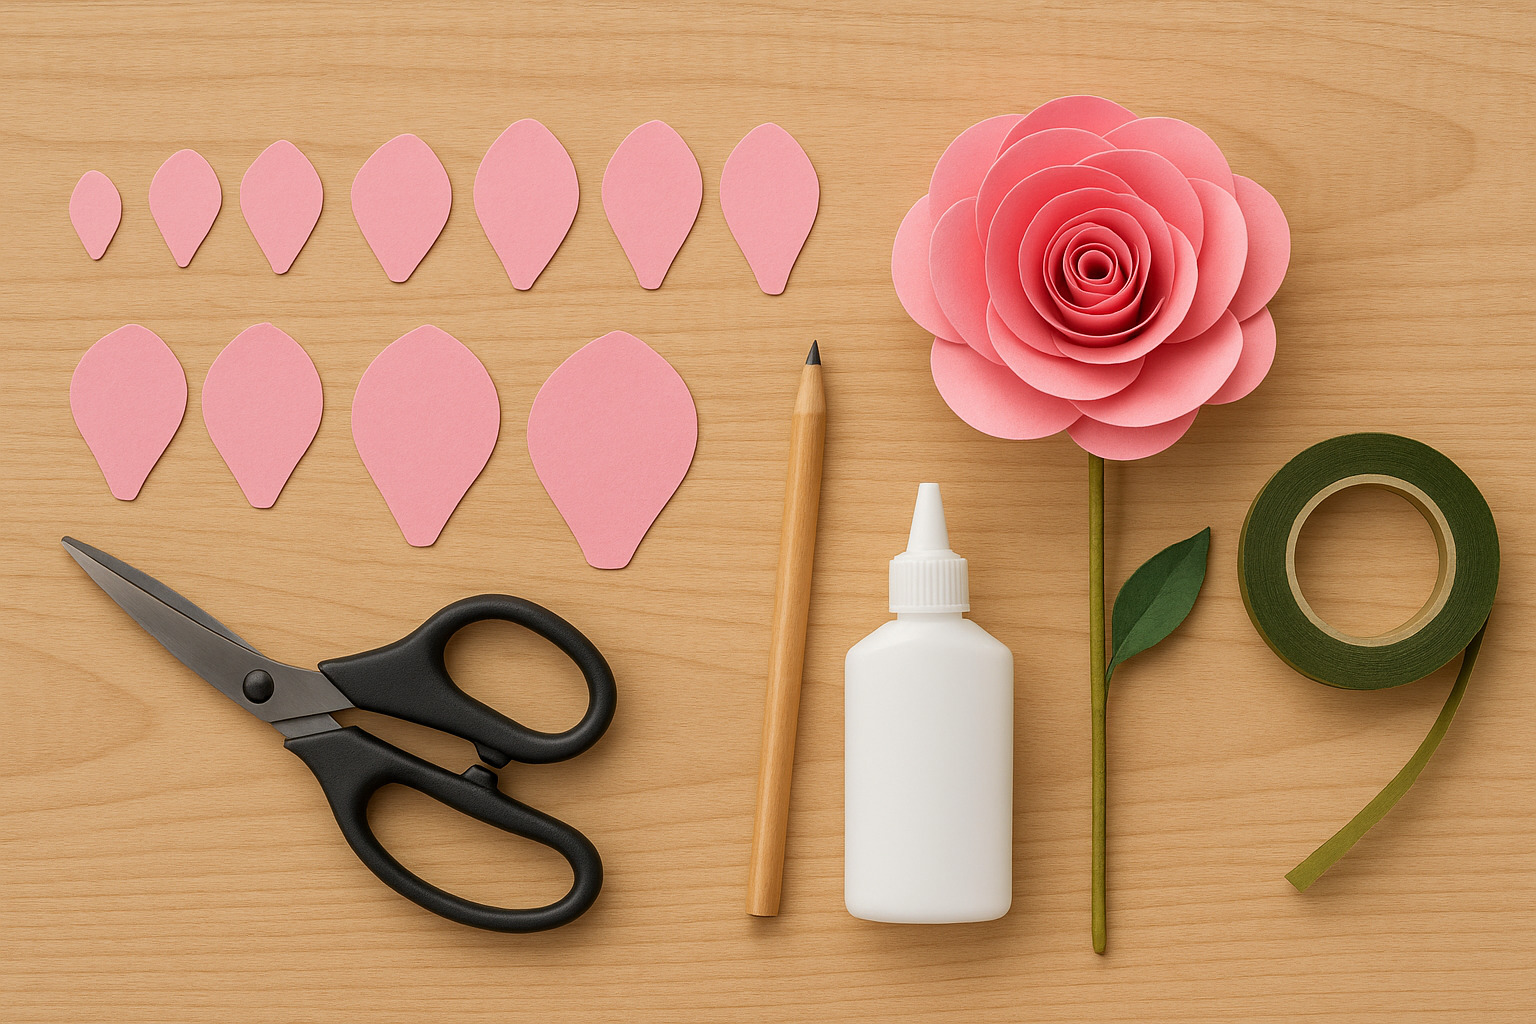
- Colored paper (preferably cardstock or crepe paper)
- Scissors
- Pencil
- Craft glue or a glue gun
- Wooden skewer or floral wire (for the stem)
- Green floral tape (optional)
- Ruler (optional)
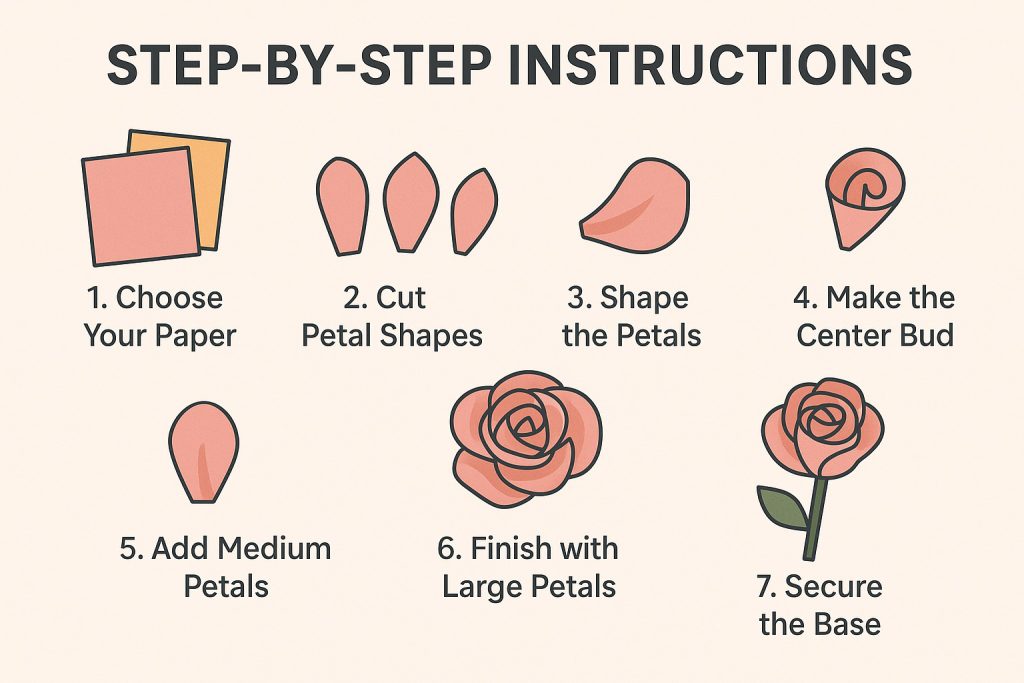
Step-by-Step Instructions
1. Choose Your Paper
Use paper that holds its shape but still bends smoothly. Crepe paper creates realistic petals, while cardstock offers a cleaner, structured look.
2. Cut Petal Shapes
You’ll need:
- 5 small petals (about 1.5 inches tall)
- 8 medium petals (around 2 inches)
- 10 large petals (around 2.5 inches)
Freehand drawing adds character, but you can trace one shape repeatedly for uniformity.
3. Shape the Petals
Roll the top edges of each petal backward around a pencil or skewer to mimic a natural curve. For added dimension, cup the center of each petal by pressing gently with your thumb.
4. Make the Center Bud
Take one small petal, curl it tightly into a cone, and glue it to your skewer or wire. Wrap two more small petals around it, overlapping slightly. This creates the rosebud center.
5. Add Medium Petals
Glue the medium petals around the center bud. Stagger them for balance and natural spacing. Let each one overlap the last slightly to create the spiraled appearance of a blooming rose.
6. Finish with Large Petals
Continue with the large petals, wrapping them around the base of the previous layer. Adjust spacing as needed to keep the rose from looking too tight or too spaced out.
7. Secure the Base
Wrap the bottom of the flower with floral tape or a strip of green paper. If you’re using a wooden skewer, cover the stick with floral tape to complete the stem.
Tips for a More Realistic Rose
- Use gradient paper for depth and color variation.
- Add a touch of ink or watercolor on the petal edges for a subtle blend.
- Layer petals loosely to mimic natural blooming patterns.
- Vary the petal count to create different rose sizes or stages of bloom.
Variations to Try
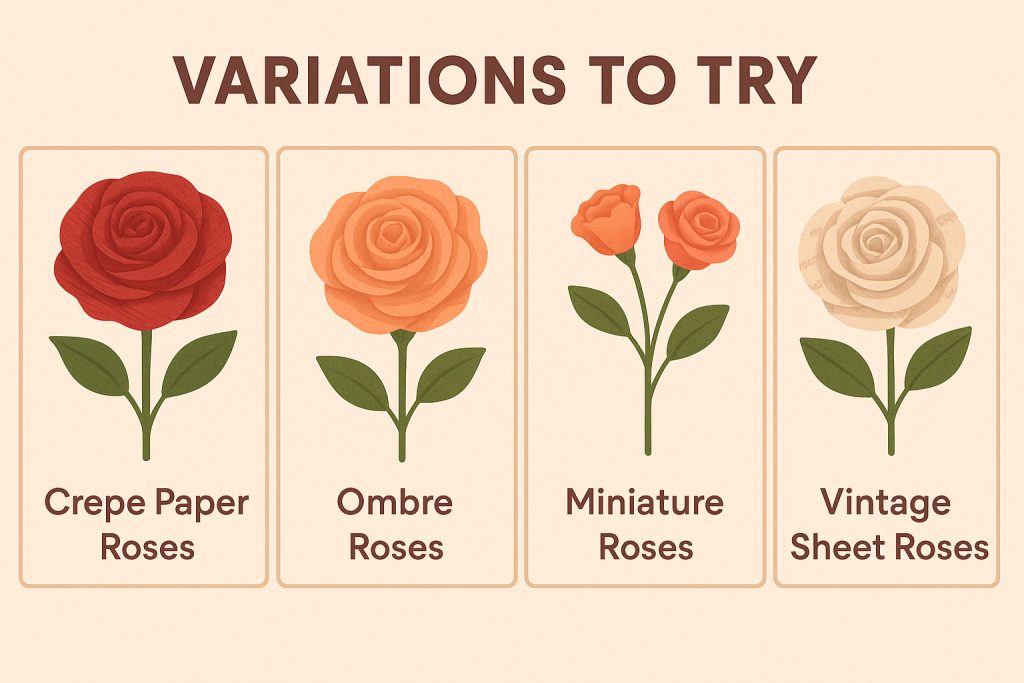
- Crepe Paper Roses: Softer, textured petals that bend easily.
- Ombre Roses: Combine three shades of the same color for a gradient effect.
- Miniature Roses: Scale down all petal sizes and use thin wire for the stem.
- Vintage Sheet Roses: Reuse old book pages or sheet music for a nostalgic touch.
Uses for Paper Roses
- Handmade bouquets
- Party decor
- Wedding centerpieces
- Gift toppers
- Wall art
- Keepsake ornaments
Maintenance and Storage
Keep your paper roses away from direct sunlight and moisture to prevent fading and warping. Store them in a box with tissue paper if not displayed.
This method brings structure and freedom together. You control the shape, size, and finish. With practice, your paper roses can rival the real thing—lasting longer and requiring no water.